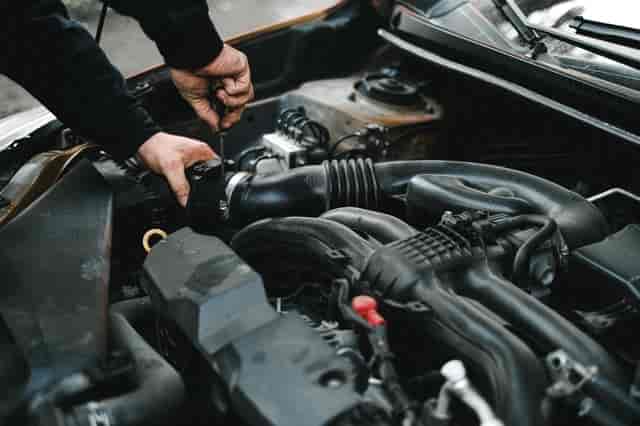
You know how valuable a battery is to your car and how expensive it is due to the same reason.
There are over 40 types of car batteries having different characteristics in the market with a starting price tag of over $90, going all the way to $200 or even more.
Still, irrespective of the battery, type, and price, no battery can live beyond 3-5 years, i.e., its general life.
So, if your car battery is over 3 or 5 years old or it’s so out of shape that the last resort is to discard and replace it, think again!
Yes, discarding and replacing an old battery might seem a better option than spending bucks multiple times over its repairing.
There’s a permanent solution to this. Instead of spending your valuable money multiple times, spend some more amount once coupled with some efforts to recondition the same battery.
If you don’t know what reconditioning a battery is, here it is. In simple terms, reconditioning a car battery means restoring an old & damaged battery to its total capacity, just like a brand new piece.
It’s the best way to save money that otherwise will get spent on procuring an expensive new battery. Read on to know more about reconditioning a car battery.
Things you need before you start re-conditioning
Reconditioning the car battery that is either old or severely damaged is the best way to instill life into it. At first, it might seem a complicated and challenging process to undertake without any professional aid; it’s not so in reality!
Yes, reconditioning a car battery is a simple process anyone with just a basic knowledge of electronics can accomplish easily.
For this, you need not spend anything on expensive and savvy equipment, and merely some protective gears, household chemicals, and a few tools are enough. Refer to the following list of things you’ll require to recondition your car battery.
You will require the following protective gears:
- You can use any apron for this purpose; however, we would recommend you a specialized apron for additional safety.
- Dealing with a car battery requires a quality face shield and eye goggles.
- Load yourself with thick gloves since you will have to contact the chemicals present inside the battery.
Next, you will require the following tools:
- Since the battery is either dead or completely discharged, get yourself any car battery charger like a 40-amp charger, fast charger, smart charger, trickle charger, or multi-stage charger.
- To measure the voltage of the battery, you will need a voltmeter.
- Although not necessary, having a load tester is a recommendation.
Lastly, you will need the following basic household chemicals or items:
- A funnel (any size would do),
- A couple of large plastic (no metal) buckets,
- Distilled water,
- 1-pound Epsom salt,
- 1-pound baking soda
- Steel wool,
- Any old toothbrush for the cleaning purpose,
- A dedicated battery terminal cleaner,
- A toolkit with a flathead screwdriver.
Once you have collected all the above materials, you are good to proceed with the below battery reconditioning steps.
Read:
How To Recondition A Car Battery?
So, after you have collected the things mentioned above and have equipped yourself with some basic electrical fundamentals, here’s a step-by-step guide to recondition a car battery.
Prepare yourself
Before beginning with anything else, put on all the necessary protective gears like eye goggles, face shield, and apron.
If accessible, purchase proper personal protective equipment, i.e., PPE, for this purpose to prevent your eyes and skin from harmful chemical spills.
You can either cover the floor with a stiff cloth or material or prepare a 2:1 mixture of baking soda and water. This mixture will neutralize the acid spills.
Prepare the dead or old battery.
In this step, you will need the following:
- The baking soda solution
- Old toothbrush
- Battery terminal cleaner
- Steel wool
Next, the old battery will have a hard build-up of a white-green substance all over its body, especially around the battery terminals.
So, please take the above 2:1 baking soda and distilled water solution to rub it off. You can either use the old toothbrush for this or directly pour the solution over the terminal.
The moment you do this, a minor chemical reaction will occur. There is nothing to worry about as it is common
Thoroughly clean the battery surface, negative terminal, and positive terminal with the toothbrush and wipe out the excess solution before proceeding to the next step.
Test the battery voltage
If you’re wondering why this step is needed, it will determine whether you need to recondition the battery or not.
So, after dry cleaning the battery terminals, connect the red lead of the voltmeter to the battery’s positive terminal and the black lead to the negative terminal. Here, you should know the fundamentals of a voltmeter and its usage.
Examine the voltmeter readings.
- If the voltmeter shows 12.6 volts or more, you don’t need to recondition the battery.
- If the voltmeter reading is between 10.5 volts and 12.6 volts, you should recondition the battery.
- If the voltmeter reading is less than 10.5 volts, you cannot recondition the battery, and it is better to discard it.
Empty the battery contents
Here, you will need the screwdriver, a couple of large plastic buckets, and baking soda.
If the battery is either very old or damaged, its internal electrolyte is also at fault. So, we will first drain out the entire old electrolyte from the battery.
Note that this battery electrolyte is an acidic solution. Hence, maintain a safe distance from the solution and ensure you cover it from head to toe.
Loosen all the screws, lift the top cover of the battery, with some help, lift the battery and pour its content into the large buckets. Be careful and pour slowly to avoid spills.
Before disposing of this old acidic electrolyte solution, add a generous quantity of baking soda into it to neutralize the acid.
Also read:
Now, clean the cells.
After emptying the cavity, it’s time to clean the battery cells. For this, you will require the baking soda and water solution, a large bucket, and a funnel
To proceed, place the funnel one by one over each battery cell and fill the same with the baking soda solution till the rim.
Once done, cover the cells, lift the battery, and shake for a couple of minutes. Remove the caps and empty the solution in the bucket.
Refill your homemade electrolyte
Yes, you will prepare your homemade electrolyte here using just boiling distilled water and 1-pound Epsom salt.
Since this is the most crucial step of the whole reconditioning process, be mindful of its proportions. For the electrolyte solution, boil the water (approx. 4 cups), add 4 oz.
Epsom salt, and stir until the solution becomes crystal-clear. The following are the key benefits of this solution.
- Prevent the cells from sulfating.
- Elevate the life of the battery.
- Increase the voltage and amps to the new battery level.
Next, refill all the battery cells with the solution and shake for a couple of minutes through the funnel.
Charge your battery
Here, keep the following things in mind.
- Use a slow charger (preferably 2-amps),
- Remove the battery caps to prevent the solution inside from heating up.
Next, connect the charger as usual, i.e., negative terminal to negative terminal and positive terminal to positive terminal. Leave this set up to complete.
Again test the battery voltage.
In this step, connect the voltmeter as before and check the reading. If the reading is 12.43 volts or above, you can load test the battery. If it’s lower than 12.43 volts, you will need to charge the battery further.
Test the battery
Here, you can either use the load tester if you’re short of time. The tester will display the result on its screen. Or you can practically test the battery by connecting it to the car.
For this, properly connect the battery to the car, without turning on the engine, test everything you can test like the radio, dashboard lights, lights, air conditioner, etc. Keep testing for another 5-10 minutes.
Congratulations! You have successfully reconditioned your old battery.
Also read:
Reasons why you should recondition your car battery
After the above tedious battery reconditioning process, its following benefits will lighten you up to the fullest.
- Reconditioning the old car battery renovates the battery and makes it function like a new battery. This way, you save yourself lots of bucks and resources.
- You should know that batteries contribute to pollution. Hence, if you’re reconditioning the battery and reusing it, you are helping mother Earth.
- Reconditioning a car battery is a popular career field, and you can earn handsomely in this.
- If you get stuck at a location where there is no other way to start the car or battery, and if you know how to recondition the battery, you can do it and get to the nearest service center.
- You can use your knowledge of battery reconditioning to recondition all the damaged or old batteries around you to sell them cheaply in the market.
